Wireless Interface for ECU
Raspberry Pi based device used to encapsulate USB communications in a TCP payload
Background
I wanted to be able to connect to my Holley Dominator ECU wirelessly to make tuning changes and datalog, so I started researching into available methods to accomplish this. A&P Electronics offers a product called the Cable Blaster that passes USB communications over TCP/IP via an ad hoc wireless network. It’s a nice device, but at over $300 I figured I could do it myself for less. It’s nothing more than a Raspberry Pi that is configured to encapsulate USB messages into a TCP/IP payload.
Overview
 To start, I flashed a lite Linux distribution onto a Raspberry Pi 3 B+. You want the install to be as minimal as possible to speed boot times and limit system resource usage. USB/IP sharing can be configured a number of ways, but the cleanest client/server arrangement that I found was developed by VirtualHere. There are two software components that need to be installed and configured. The USB/IP server will reside on the Pi and the client will be installed on the host computer running the Holley EFI software. VirtualHere has compiled server packages for a variety of architectures including multiple iterations of the Raspberry Pi (ARM). Download the appropriate version for whatever platform you decide to run, and configure the server daemon to start on boot. The remaining server configuration will be handled through the client application.
Download and install the USB/IP client software. With the Pi and USB/IP server up and running, an ad hoc wireless network should be broadcasting. By default, the SSID is cloudhub66. Once connected to this network, launch the client and it will negotiate with the server. The broadcast SSID and other parameters can be managed through the client, if desired. No other configuration should be required to communicate with the ECU. The ECU USB cable can be plugged into the Raspberry Pi, and the client will recognize the device and expose it to the computer as if it were plugged in directly. Interaction with the ECU through the Holley EFI software can be done as normal.
Enclosure
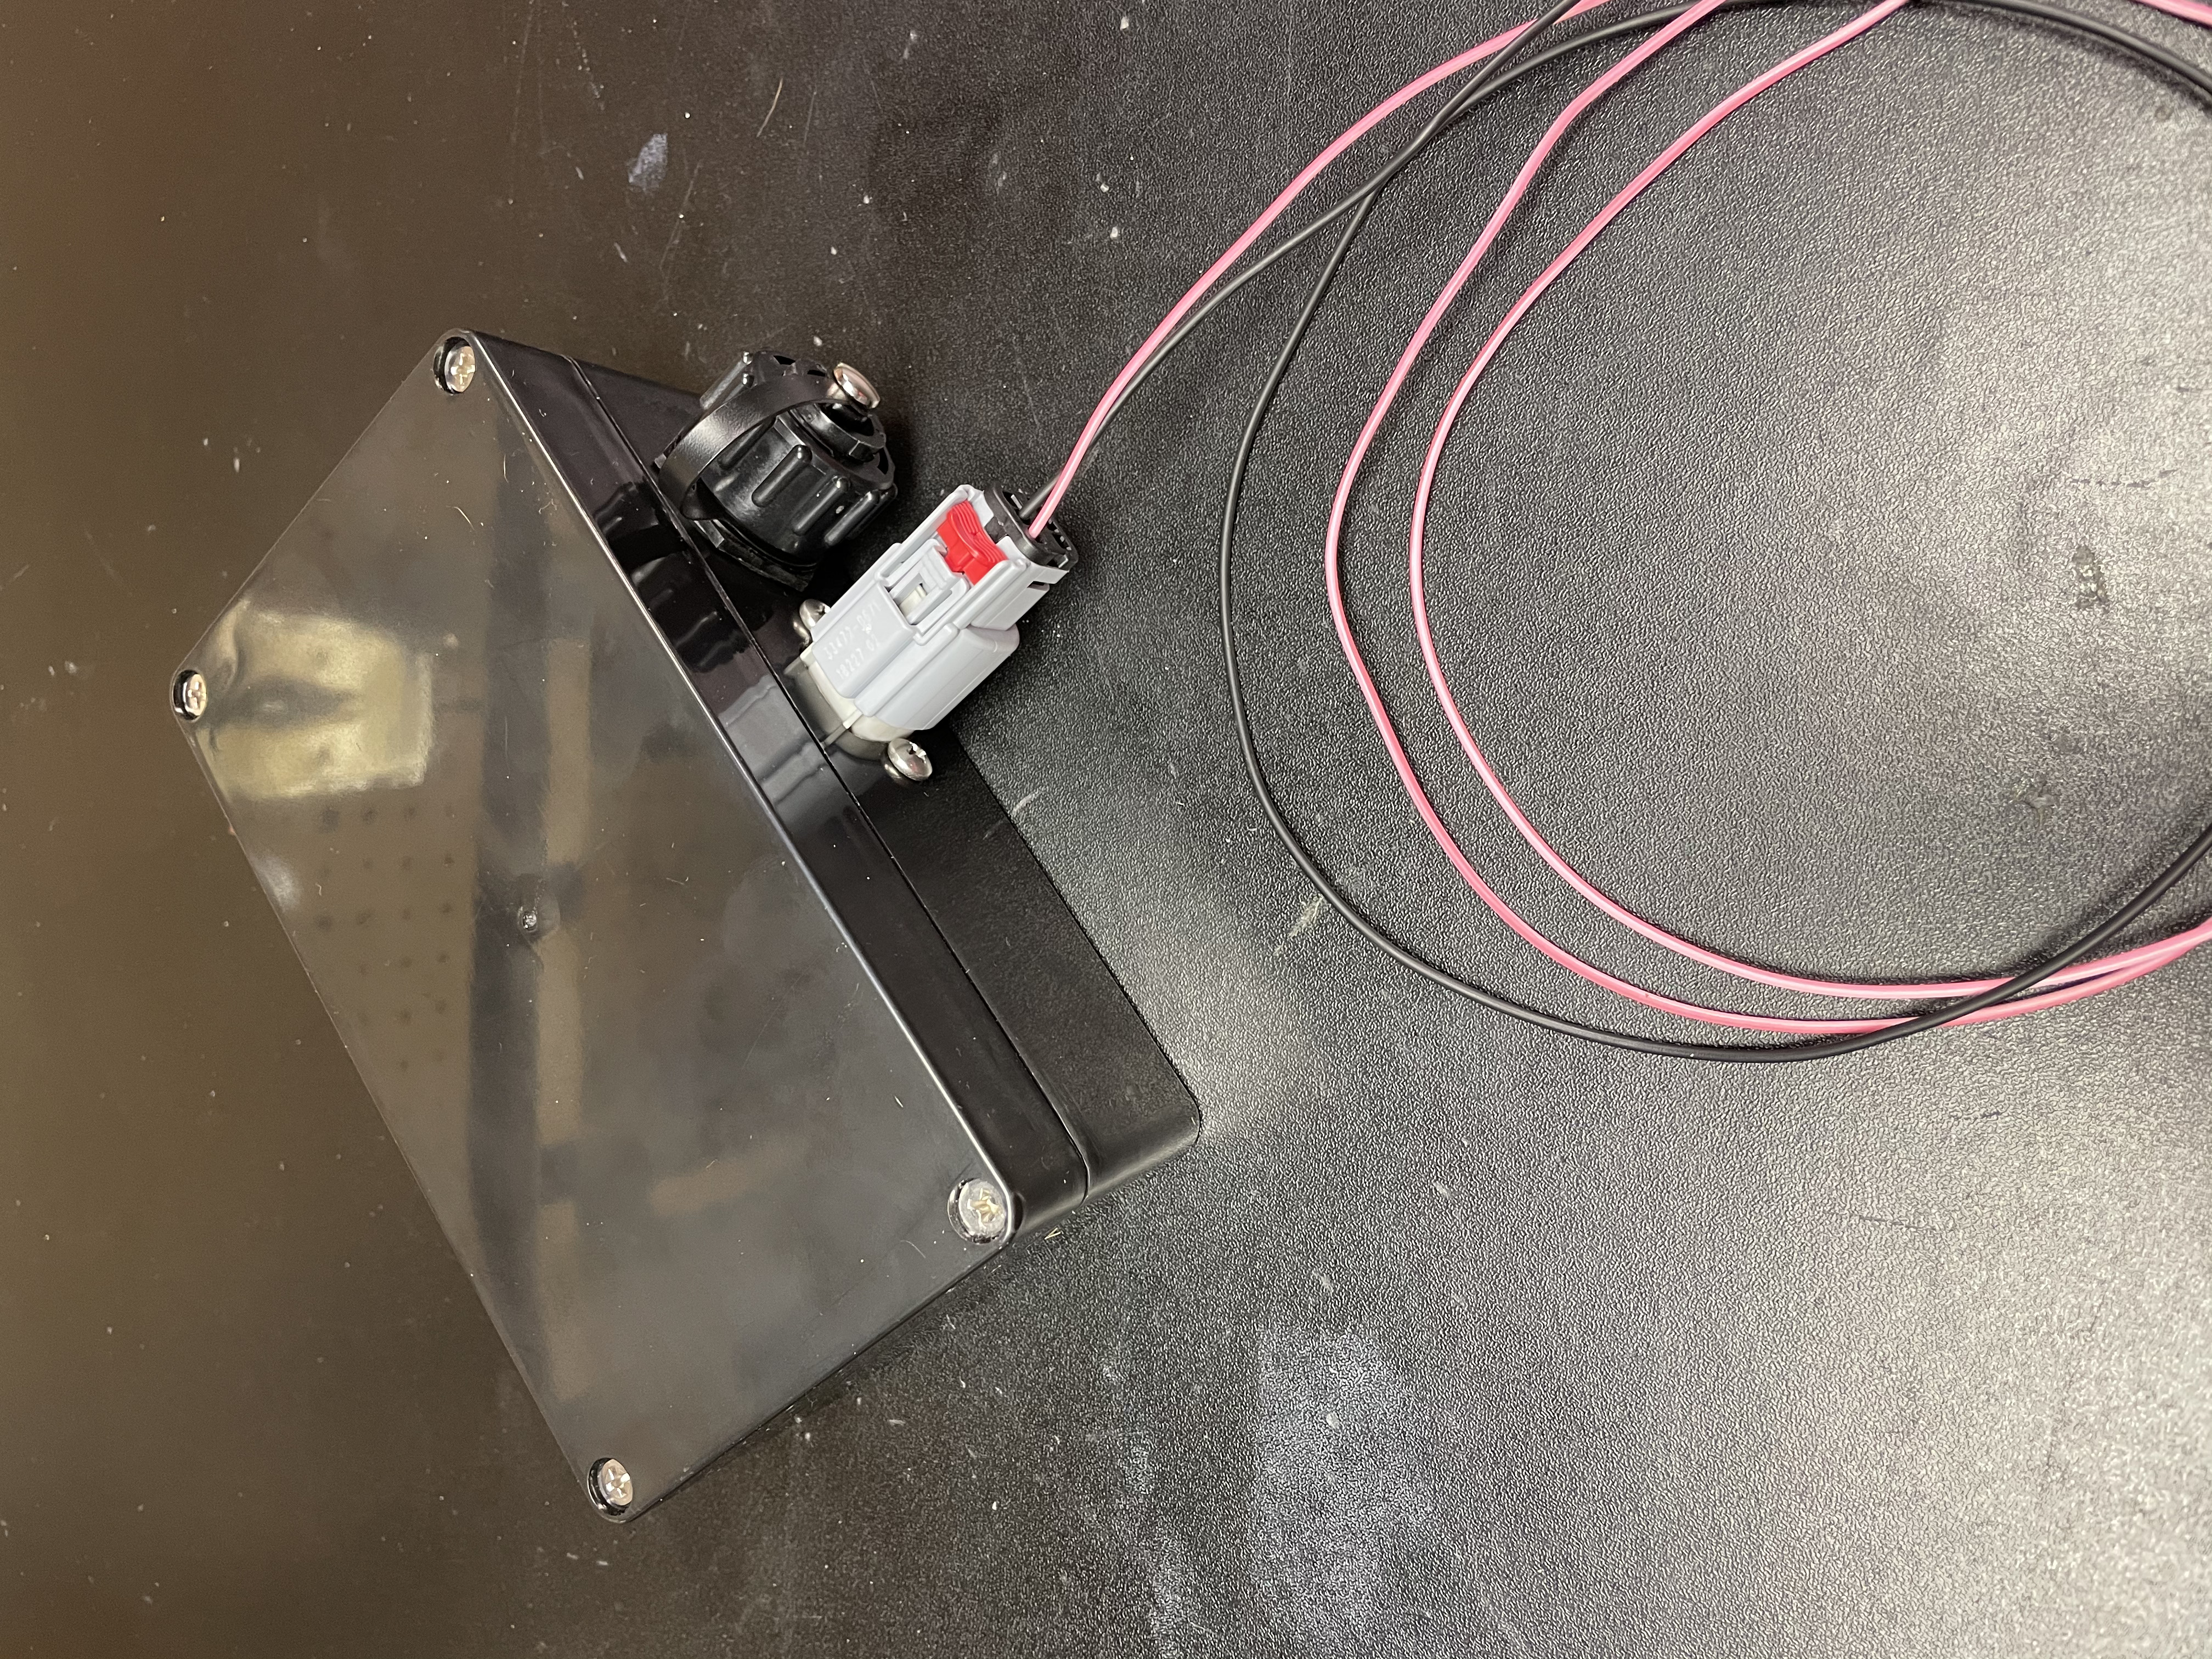
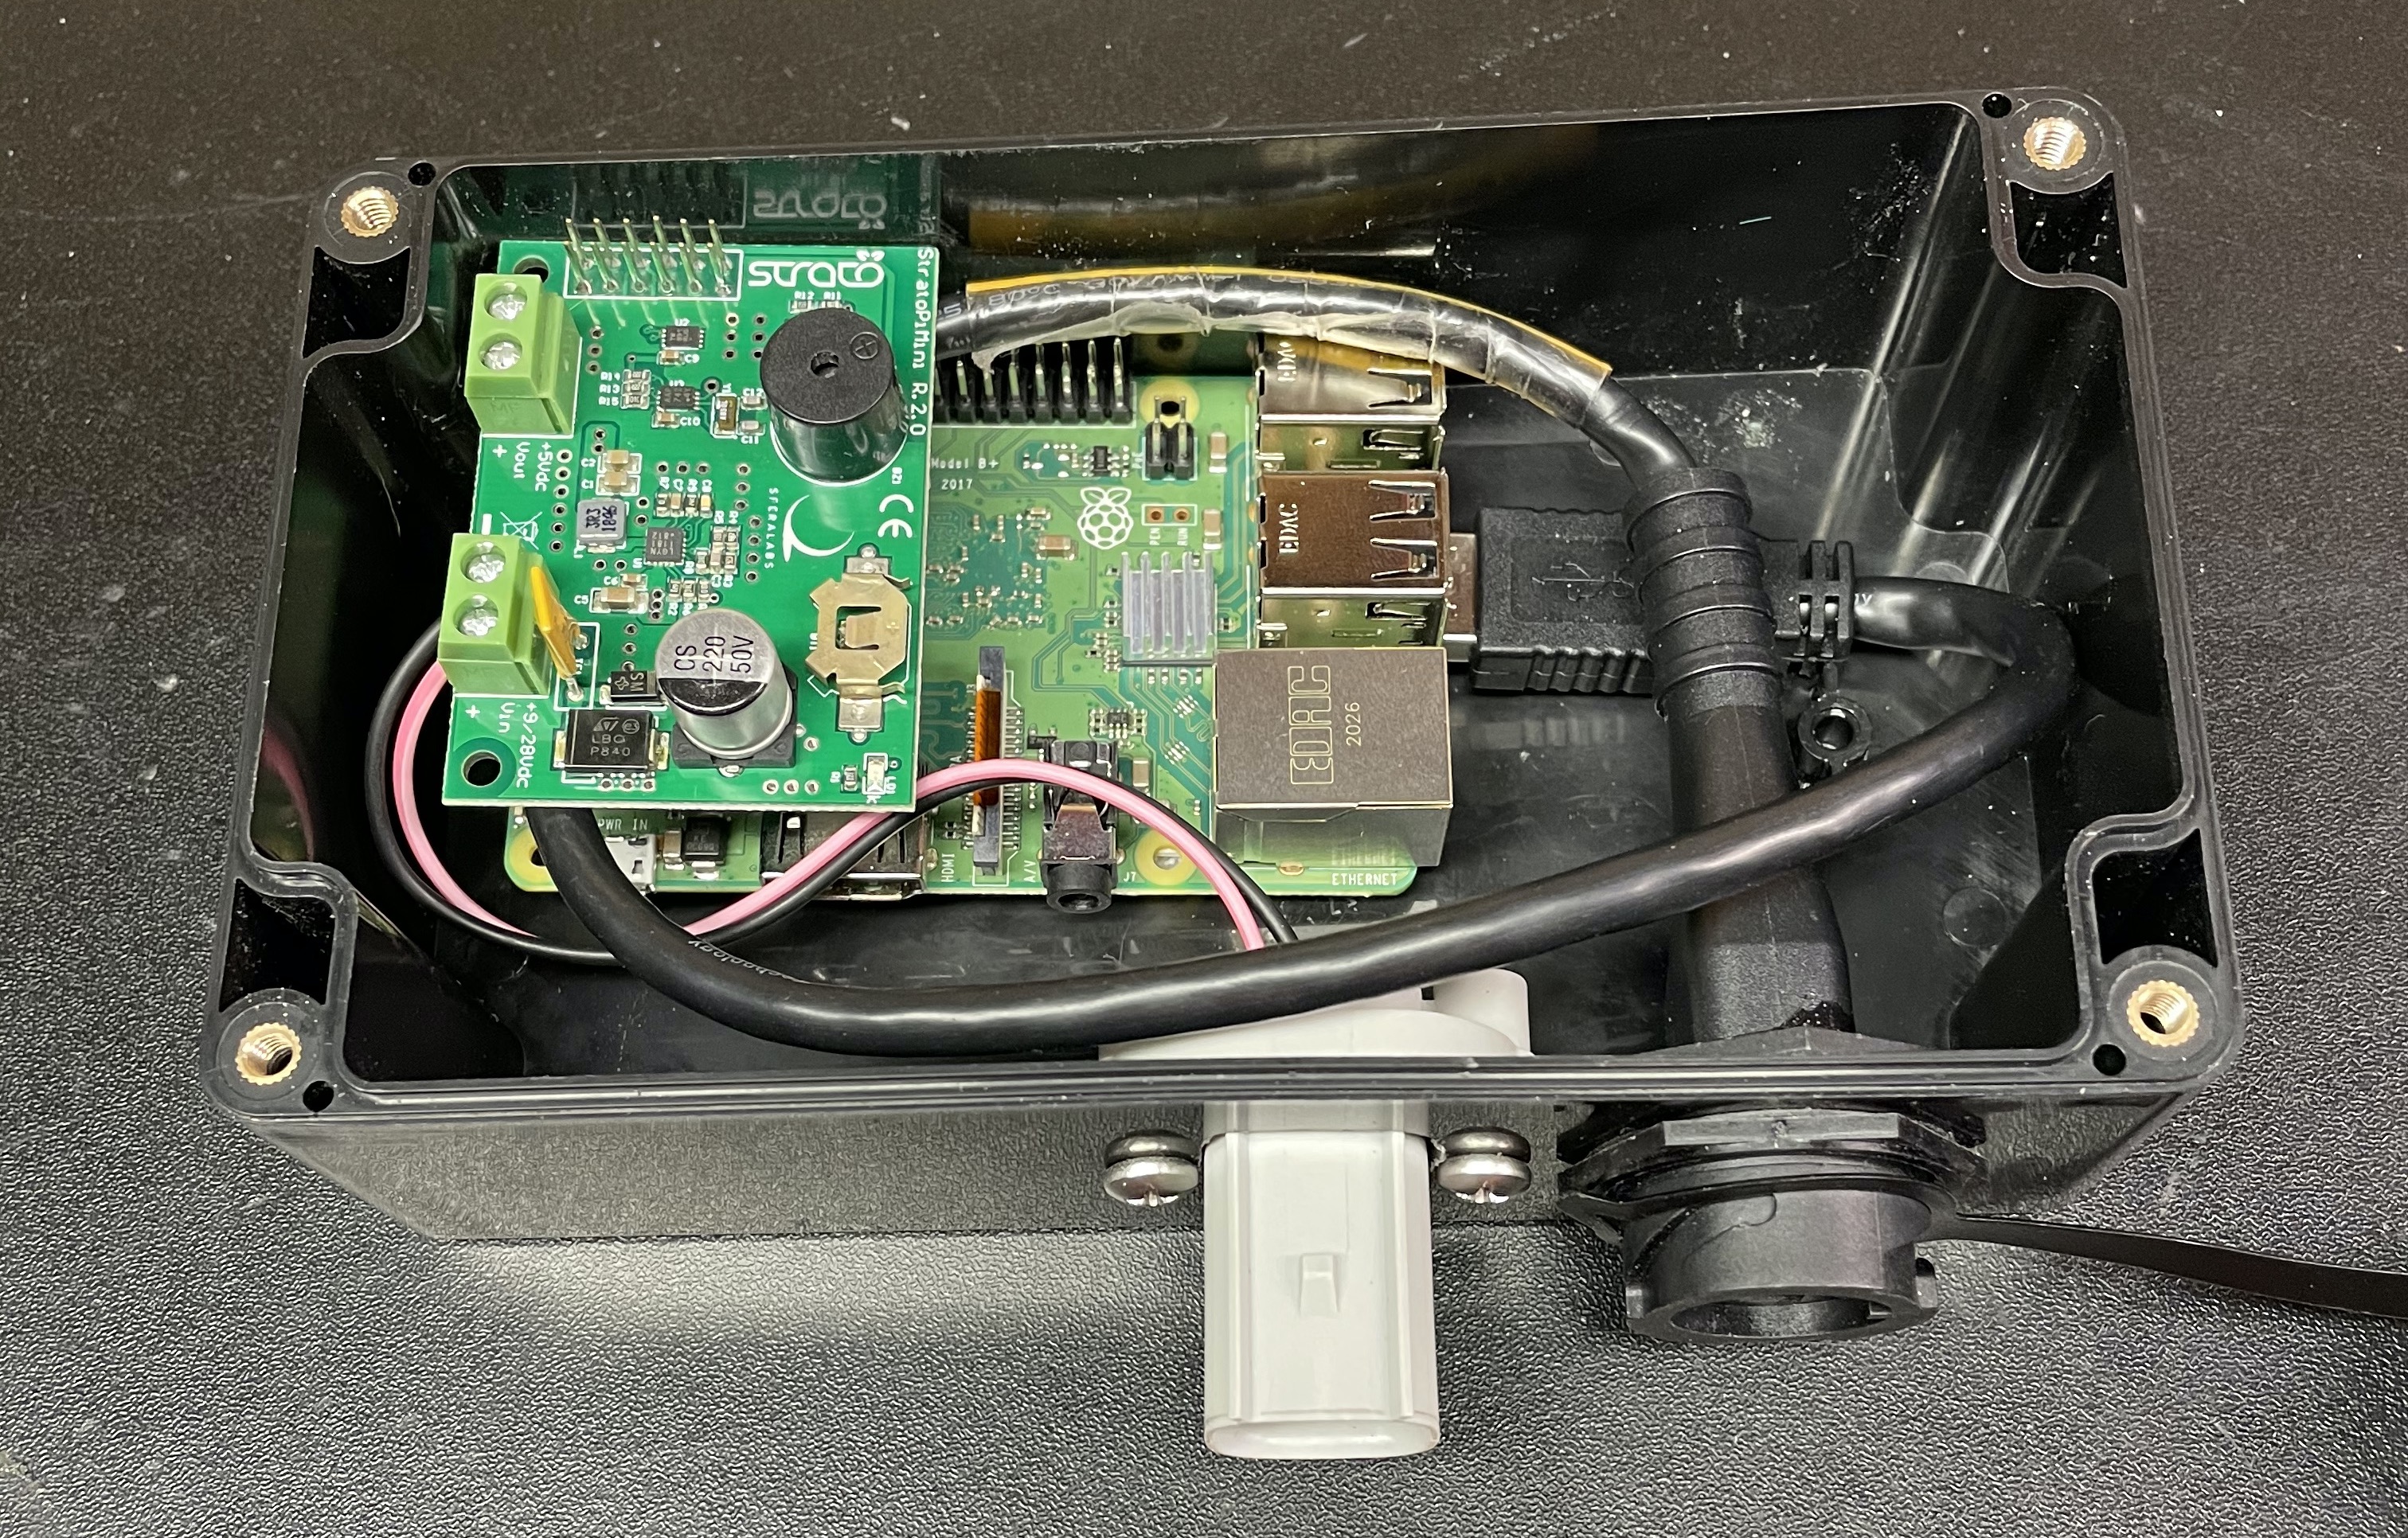 With the basic functionality sorted out, I decided to make an enclosure for the Raspberry Pi that would be suitable for an external mounting location and work with 12 VDC. I also wanted the enclosure to be weather proof and be removeable. This arrangement has worked well for me so far. For less than $50, I can interface with the ECU wirelessly as if were connected directly with the cable. There are some drawbacks to this setup, however. There will be the delay in the Pi booting and starting the server plus the time to join the network. This isn’t always a significant issue, but if you want to log a quick startup for example, it can get cumbersome. Security and software updates on the Pi are another matter that need to be considered as well.
Parts List
| Description | Manufacturer | Part Number |
|---|---|---|
| Computer | Raspberry Pi | 3 B+ |
| Enclosure | Zulikt | 6.22 x 3.54 x 2.36 |
| Power Supply (Hat) | Sfera Labs | SPB20X |
| USB Panel Mount Receptable | Molex | 84733-0020 |
| Dust Cap | Molex | 84700-0003 |
| Panel Mount Connector for Power | Molex | 148028-6004 |
| Terminals for Panel Connector | Molex | 33000-0002 |
| Cable Connector | Molex | 33472-0671 |
| Terminals for Cable Connector | Molex | 33012-2002 |
| Cavity Plugs for Cable Connector | Molex | 34345-0001 |
The power hat that I chose has 5 VDC output terminals, so I can expand and add other sensors such as an accelerometer to the case. Signal outputs can be sent out through an open cavity in the connector assembly.